PCB Manufacture
The Printed Circuit Board (PCB) for the switch must be manufactured before the switch can be assembled and used in its default configuration. This is normally done by sending the manufacturing files to a vendor, such as OSHPark and then waiting for the finished boards to be shipped.
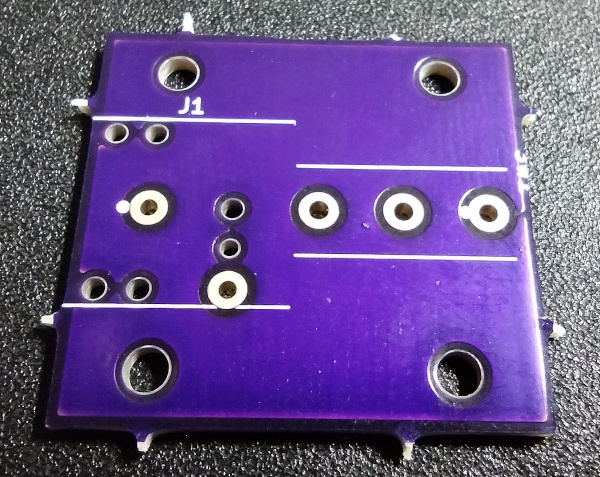
Sending Files to a Manufacturer
All of the files necessary to have the printed circuit board (PCB) manufactured are available as a zip file for download here. If a manufacturer such as OSHPark is being used, the KiCAD project file can be uploaded directly. That file can be downloaded here (right click and select Save Link As). Instructions on uploading files for every manufacturer is beyond the scope of this documentation, but OSHPark will be offered as an example. This is not a direct endorsement of OSHPark, although 7B Industries does use OSHPark to produce finished PCBs.
Step 1: Account Login
Navigate to oshpark.com and create an account or log in.
Step 2: Upload Files
The OSHPark landing page has an area where the KiCAD project file can be dragged and dropped. Alternatively, users can click the BROWSE FOR FILES button and upload the file through their web browser's file manager.
The file should upload, be processed, and then an About your board page will load. Initial information such as the cost of manufacturing should be displayed.
Step 3: Click Through the Board Confirmation Screens
The default settings should be fine for this design. Click the Continue button to advance past the About your board page.
The next page that will be loaded is called Verify your design. Scroll down through the images shown of the board just to make sure that nothing obvious is wrong. Once at the bottom of the page, click the Order button.
Step 4: Ordering
The rest of the process is typical of most online shopping carts. There is no need to add any of the optional services such as "2 oz copper" unless you want to. Check out, enter the shipping information, and pay.
Step 5: Wait
When ordering PCBs from online manufacturers, it often takes weeks to receive the finished boards. It is also a good idea to check to see if there will be any import fees that are due. Selecting a manufacturer that is closer to your location may help avoid unnecessary import duties.
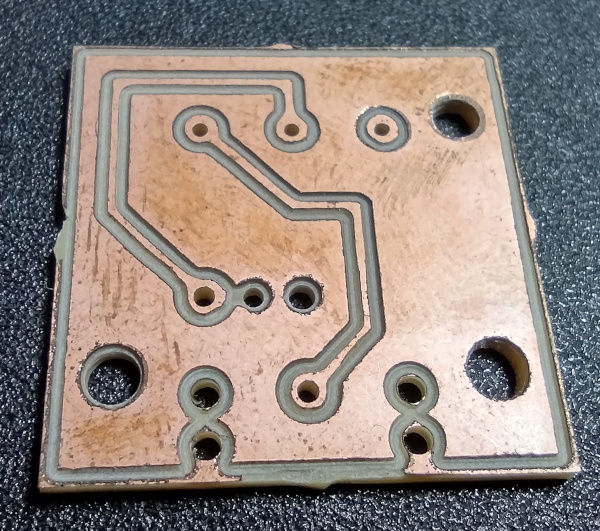
Isolation Routing (Optional Advanced DIY Manufacturing)
The PCB has been laid out in such a way that it is possible to use isolation routing on a CNC machine to manufacture it. That is how the initial prototypes are made by 7B Industries. This method should not be attempted unless the user is familiar with CNC machines. This method only provides a board with the proper traces, and does not include solder mask or silkscreen.
When isolation routing is attempted, use a v-shaped engraving bit set to the appropriate depth. The "appropriate depth" will vary based on the exact bit used and the copper thickness on the copper clad board, and may take some experimentation to determine. The traces have 0.508 mm of clearance around them, so by setting the proper depth of the bit and the width of the tool to 0.508 mm, it should be possible to route the board in a single pass. Experimentation is often needed to complete this process effectively though, and is attempted at your own risk.