
Braille Label Generator Documentation
Contents
- Introduction
- Limitations
- Offline Documentation Format
- Making a Braille Label
- Download
- Post Processing (Optional)
Introduction
The braille label generator is software that generates 3D-printable braille labels based on user-provided English text.
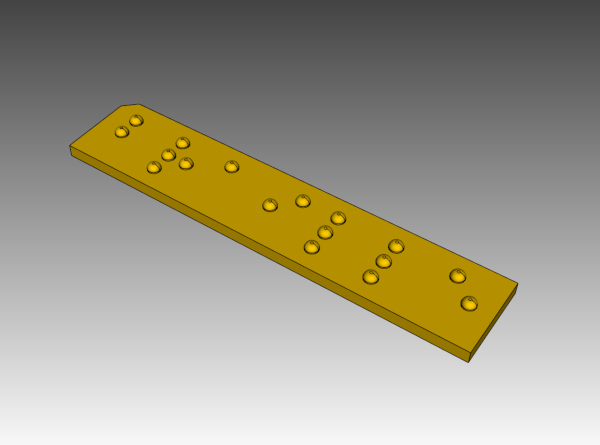
This generator attempts to comply with the standards set forth in American National Standard: Accessible and Usable Buildings and Facilities: 2003: Standard and Commentary, chapter 7, section 703.4, table 703.4-3 for braille dimensions. These standards may not be compatible with the regulations and standards in your region. Always consult local laws, standards and regulations to determine if this label will meet requirements.
This design is open hardware, and the source code needed to reproduce and modify it for your own use is hosted on Codeberg. There is also an online customizer that does not require any technical knowledge for those who just want to create custom braille labels.
Limitations
- Targets only a single United States braille standard.
- Supports only a single line of braille text.
- The online customizer only supports 100 characters of text.
Offline Documentation Format
A PDF of this documentation is also available for download so that it can be used offline.
Making a Braille Label
There are three high level steps involved in creating a braille label, and separate sections for each step are listed below.
- Download - Generate a 3D-printable STL with custom braille text using the web-based customizer.
- Print - Print that plate with settings that will result in a label with acceptable quality.
- Post Processing - Optional step for cleaning up label dots when the print quality is not acceptable.
Download
A web-based customizer is provided where users can enter the text that will be on the braille label, and then download the result. The page to create and download a braille label can be accessed by clicking this link. Instructions are included on that web page, but additional detail is given here.
Below is a screenshot showing the fields used to alter how the label is generated, and an explanation of each field is provided below the screenshot.
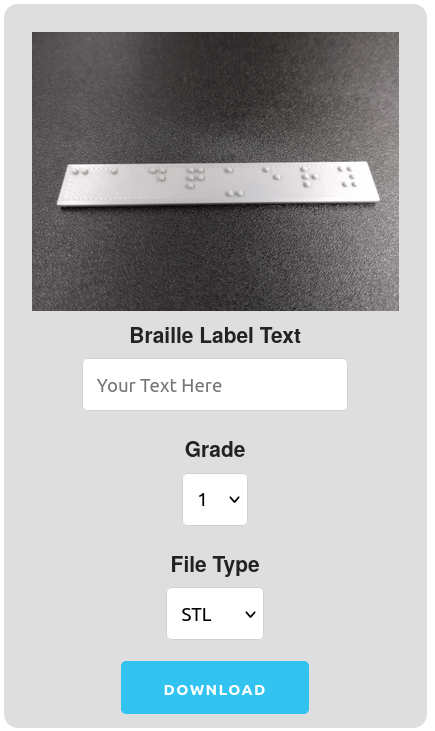
- Braille Label Text - Sets the custom braille dot pattern for the label by entering the english text in the field. Characters other than letters and numbers are not supported. Users are limited to 100 characters for the label length to limit abuse of the web-based system.
- Grade - Setting this to grade 1 will generate uncontracted braille, and setting to grade 2 will generate contracted braille. For those just learning braille, grade 1 will likely be appropriate. For advanced braille readers, grade 2 will be the likely choice.
- File Type - Setting this field will determine the downloaded file's format. If unsure which format to choose, STL is a safe format for 3D printing. AMF is a more full-featured 3D printing format but is not as universally supported as STL. STEP is useful for interchange with other CAD systems and CNC machines.
- Download - Once the other fields have been set, clicking this button will generate and download the custom braille label. The label will take a few seconds to generate, and then will download in the web browser. The amount of time that the generation takes varies depending on how many characters the label has.
Print
In order to work better for 3D FDM (filament) printing, the dimensions of each braille dot have been set to the maximum allowed. This can cause the dots to be oversized on 3D printers with insufficient dimensional accuracy. Printing with anything larger than a 0.4 nozzle will likely lead to print quality problems as well. Finer detail settings must be used when slicing the label for printing. PETG and PLA filaments have both been tested for making these labels and work well.
An SLA 3D printer has also been used to print test labels and provides better quality braille dots. Using an SLA printer is a good option if one is available.
The rest of this section will assume the use of an FDM (filament) 3D printer because those are the most widely available.
STEPS1. Open the STL or AMF label file in any slicer software. Ensure that the braille plate is positioned so that the flat side will be printed on the bed of the 3D printer, with the dots on the top side.
2. Make sure that the layer height is set as low as possible. Values around 0.15 mm or 0.18 mm are sometimes as low as the setting will go.
3. Supports should be disabled since they are not needed.
4. Any infill of 20% or higher should work because the braille dots are so small that sparse infill is ignored and the dots are printed solid.
5. Printing with a brim/skirt is recommended, especially when printing in PLA, to make sure the plate stays flat on the print bed during printing. It is up to the user though as to what will work best with their printer.
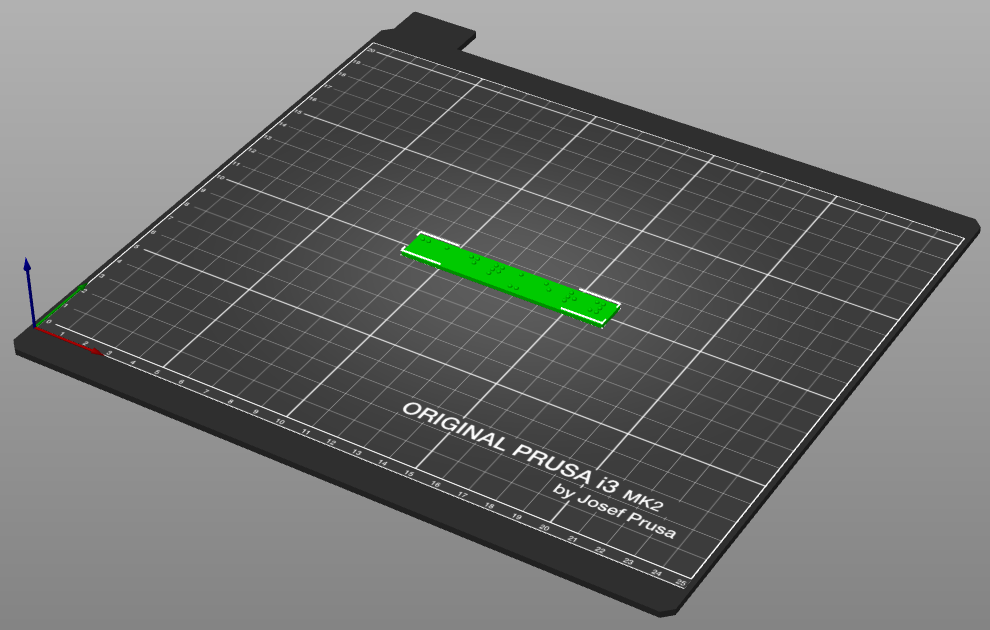
Below is a screenshot of sample 3D printer settings that have been used to print labels.

If the dots on the printed label have defects, the next section can help correct some issues. This YouTube video (timestamp 7:31) gives some extra tips on how to get the best possible braille dots from an FDM (filament) printer. Following these tips can decrease the need for post processing.
Post Processing (Optional)
Due to the close positioning and small size of the braille dots, stringing (shown below) along with other print defects are possible and may require some post processing to clean the dots up to an acceptable level. It may be possible to reduce or eliminate stringing by adjusting the nozzle temperature and retract settings for your printer. If strings, sharp edges on dots, and other defects are observed on the printed label, this section contains information on how to clean the dots up.
 Removing Protrusions from Dots
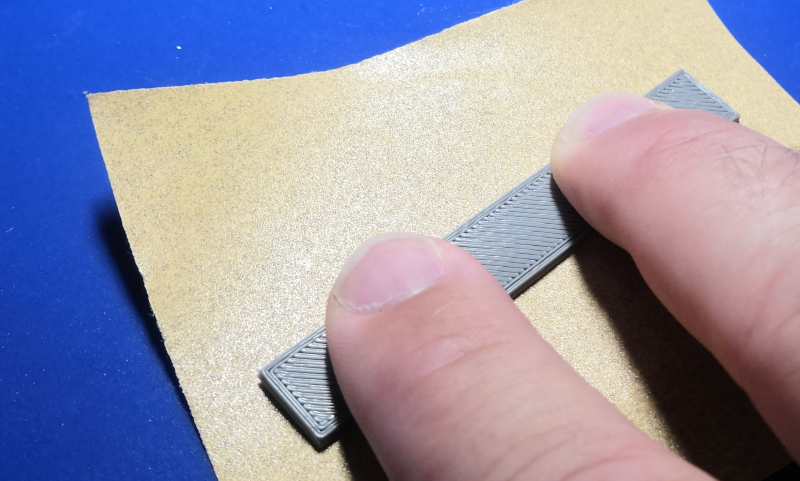
Due to the nature of FDM 3D printing, it is likely that there will be roughness or protrusions on the top of the braille dots that may make them less comfortable to scan with a finger. These protrusions can be removed by placing the braille label dot side down on a sheet of fine grit sandpaper and moving it back and forth while gently applying pressure.
It should not require a lot of sanding to make the dots more comfortable to scan. Five to ten gentle strokes should be sufficient if your 3D printer is capable and set up properly. Be sure to hold the label level during sanding so that material is removed evenly from the dots.
A fine triangle file can also work for removing larger excess deposits of plastic, but can easily damage dots as well. Care must be taken when using a file.
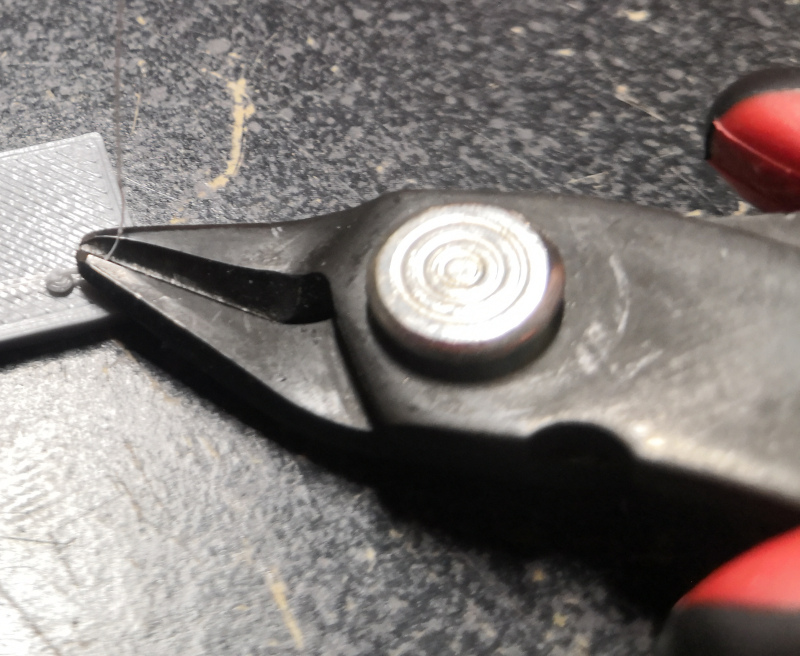
Clipping Strings
Cleanup of strings can be done with a pair of flush cutters. Take care to only clip the strings and taller protrusions, and do not cut into the main body of the dots.
© 2018-2026 7B Industries